Building your own PC might seem intimidating if you have never done it before, but here is the truth: if you can follow instructions and use a screwdriver, you can build a PC. Modern components are designed to fit together in specific ways, making it nearly impossible to plug something into the wrong slot. Millions of first-time builders assemble PCs every year, and the vast majority succeed on their first attempt.
This guide walks you through the entire process from unboxing to first boot, with detailed explanations for every step and warnings about the mistakes that trip up beginners. By the end, you will have a fully functioning PC that you built with your own hands, and that feeling of accomplishment is worth every minute of the process.
What You Will Need
Essential Components
Before you start building, make sure you have all the following components. Missing even one means your build cannot proceed, and there is nothing more frustrating than waiting days for a single missing part.
- CPU (Processor): AMD Ryzen or Intel Core. Make sure it matches your motherboard socket.
- CPU Cooler: Many CPUs include a stock cooler in the box. Check before buying a separate one.
- Motherboard: Must match your CPU socket (AM5 for Ryzen 7000, LGA 1700 for 12th/13th/14th Gen Intel).
- RAM: DDR4 or DDR5 depending on your motherboard. Check compatibility before purchasing.
- Storage: NVMe SSD recommended. At least 500 GB, ideally 1 TB.
- GPU (Graphics Card): Unless your CPU has integrated graphics and you are not gaming.
- Power Supply (PSU): 80+ Bronze certified minimum. Wattage depends on your components.
- PC Case: Make sure it supports your motherboard size (ATX, Micro-ATX, or Mini-ITX).
Not sure which components to choose? Our PC Builder tool lets you select compatible parts and see the total price before you buy.
Tools Required
You need surprisingly few tools to build a PC:
- Phillips-head screwdriver (#2 size): This is the only tool you truly need. A magnetic tip makes life much easier for holding screws in tight spaces.
- Anti-static wrist strap (optional but recommended): Connects to your case or a grounded surface to prevent static discharge from damaging components.
- Good lighting: A desk lamp or headlamp helps you see inside the case. Building in dim lighting leads to mistakes.
- A clean, flat surface: A desk or table, not carpet. Static electricity from carpet can damage components.
- Small container or magnetic tray: For screws. Losing a screw inside the case during building is a common and avoidable annoyance.
- Cable ties or velcro straps: For cable management after everything is assembled.
Step-by-Step Build Process
Step 1: Prepare Your Workspace
Clear a large, flat surface with good lighting. Lay out all your components in their boxes. Open each box and verify that everything is included, especially the motherboard (should include I/O shield, SATA cables, M.2 screws) and the case (should include standoffs, screws, and cable management accessories).
Read through your motherboard manual. Yes, actually read it. It shows you exactly where every component connects and which slots to use. Five minutes of reading saves thirty minutes of troubleshooting.
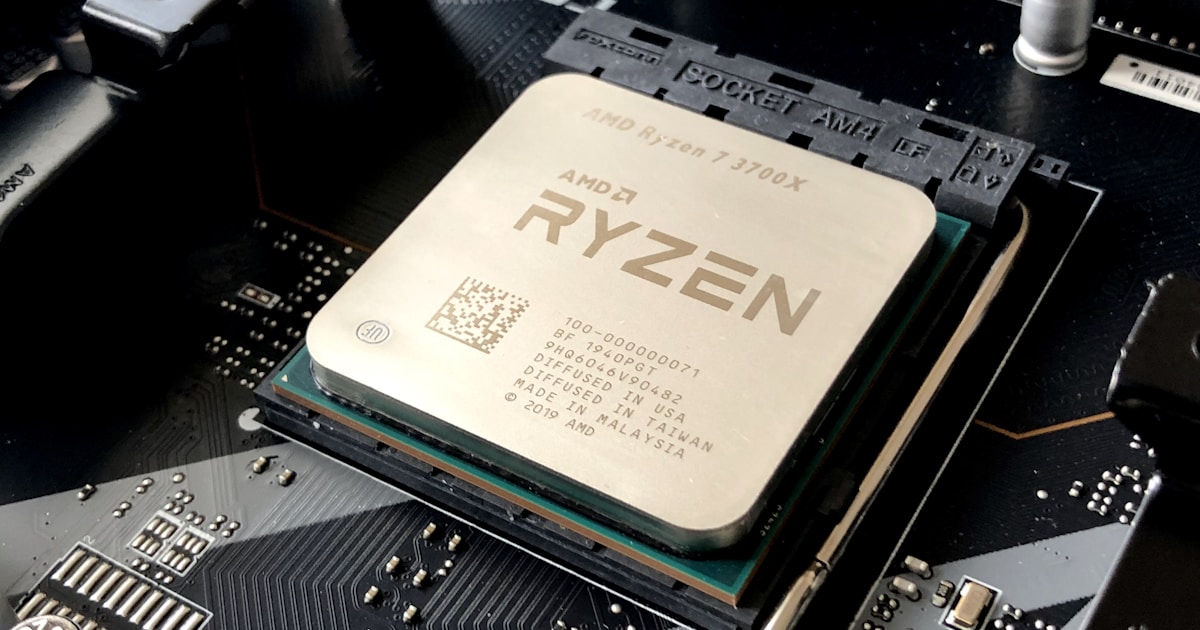
Step 2: Install the CPU
This is the step that makes most beginners nervous, and with good reason: a CPU has delicate pins (AMD) or contact pads (Intel) that are easily damaged. But if you are gentle and methodical, there is nothing to worry about.
- Open the CPU socket lever on the motherboard (lift the metal arm).
- Locate the golden triangle on the corner of your CPU. Match it to the triangle marker on the motherboard socket.
- Gently place the CPU into the socket. Do NOT press it down. It should drop into place under its own weight. If it does not sit flat, remove it and check the orientation.
- Close the socket lever. On Intel LGA sockets, you will feel significant resistance and hear a click. This is normal. The plastic socket cover will pop off automatically.
Critical warning: Never force a CPU into its socket. If it does not drop in smoothly, it is either oriented incorrectly or the socket is not fully open. Forcing it will bend pins and potentially destroy both the CPU and the motherboard.
Step 3: Install the RAM
RAM installation is straightforward but has one common mistake that catches beginners.
- Open the clips on the RAM slots you will be using (check your motherboard manual for the recommended slots, usually the 2nd and 4th slots for dual-channel with two sticks).
- Line up the notch on the bottom of the RAM stick with the notch in the slot. It only fits one way.
- Push down firmly and evenly on both ends of the RAM stick until the clips snap into place. This requires more force than most beginners expect. If the clips do not snap closed, the RAM is not fully seated.
Common mistake: Using the wrong slots. If you have two RAM sticks and four slots, do not use slots 1 and 2 (side by side). Use slots 2 and 4 (alternating) to enable dual-channel mode, which doubles your memory bandwidth. Your motherboard manual specifies exactly which slots to use.
Step 4: Install the M.2 SSD
- Locate the M.2 slot on your motherboard (usually near the CPU, sometimes with a heatsink cover that needs to be removed first).
- Remove the M.2 screw from the motherboard standoff.
- Insert the SSD at a slight angle (about 30 degrees) into the slot. It will stick up at an angle.
- Gently press the SSD down flat against the motherboard and secure it with the screw.
- If your motherboard included an M.2 heatsink, replace it on top of the SSD. Remove the protective film from the thermal pad first.
Step 5: Install the CPU Cooler
This step varies significantly depending on your cooler type. Stock coolers that come with AMD and Intel CPUs usually have pre-applied thermal paste and clip or screw directly onto the motherboard.
For stock coolers:
- If thermal paste is pre-applied on the cooler base (a grey square or circle), do not add more. If there is no paste, apply a small dot (about the size of a grain of rice) to the centre of the CPU.
- Position the cooler over the CPU and secure it according to the instructions. AMD stock coolers clip onto the bracket. Intel stock coolers use push-pins that you press and turn.
- Connect the fan cable to the CPU_FAN header on the motherboard. This is critical because without this connection, your motherboard may refuse to boot or your CPU may overheat.
For aftermarket tower coolers or AIO liquid coolers: Follow the specific instructions included with your cooler. These vary between brands and models, but the general principle is the same: mount the bracket, apply thermal paste if not pre-applied, secure the cooler, and connect the fan cables.
Step 6: Prepare the Case
- Remove both side panels from your case.
- Install the motherboard I/O shield into the rectangular cutout at the back of the case. Push it in from the inside until it clicks into place on all four sides. This is easier to do now than after the motherboard is installed.
- Verify that the standoffs in the case match your motherboard's screw holes. Most cases come with standoffs pre-installed for ATX motherboards. If yours is Micro-ATX, you may need to move some standoffs.
- Route your case's front panel cables (power button, USB, audio) out of the way so they do not get trapped under the motherboard.
Step 7: Install the Motherboard in the Case
- Carefully lower the motherboard into the case at an angle, aligning the rear ports with the I/O shield cutouts.
- Set the motherboard down onto the standoffs. All screw holes should align with standoffs underneath.
- Secure the motherboard with the included screws. Start with the centre screw to hold the board in position, then work outward. Do not overtighten; snug is enough.
Step 8: Install the Power Supply
- Determine whether your case mounts the PSU at the top or bottom (most modern cases use bottom-mount with the fan facing down toward a vent).
- If using a modular PSU, connect only the cables you need before installing: 24-pin motherboard power, 8-pin CPU power, PCIe power cables for your GPU, and SATA power for any drives.
- Slide the PSU into position and secure it with the four screws provided.
Step 9: Install the Graphics Card
- Remove the appropriate PCIe slot covers from the back of the case (usually two for most GPUs).
- Open the PCIe retention clip on the motherboard's top x16 slot.
- Align the GPU with the slot and press down firmly until the retention clip clicks closed.
- Secure the GPU to the case with one or two screws at the bracket.
- Connect the PCIe power cables from your PSU to the GPU. Most mid-range cards need one 8-pin connector; high-end cards may need two or three, or a single 12-pin connector.
Important: Use the PCIe power cables that came with your PSU. Never mix cables between different PSU brands or models because the pin-out on the PSU end can differ, potentially destroying your GPU.
Step 10: Connect All Cables
This is the most tedious but most important step. Every cable must be connected correctly for your system to function.
- 24-pin motherboard power: The large cable from the PSU. Connects to the right edge of the motherboard. Press until the clip clicks.
- 8-pin CPU power: Runs from the PSU to the top-left area of the motherboard. Route it behind the motherboard tray for cleaner cable management.
- Front panel connectors: The tiny cables from your case for power button, reset button, power LED, and HDD LED. Your motherboard manual has a diagram showing exactly where each one goes. This is the fiddliest part of any build.
- Front panel USB: A wider connector that goes to the USB header on the motherboard.
- Front panel audio: Connects to the HD_AUDIO header, usually in the bottom-left of the motherboard.
- Case fans: Connect to the CHA_FAN or SYS_FAN headers on the motherboard.
Step 11: Cable Management
Before closing the case, take fifteen minutes to tidy your cables. Route them behind the motherboard tray through the provided cable management holes. Use cable ties to bundle loose cables together. Good cable management improves airflow, makes the build look professional, and makes future upgrades much easier.
Step 12: First Boot
The moment of truth. Before pressing the power button:
- Double-check that the CPU power (8-pin) and motherboard power (24-pin) are connected.
- Verify the GPU power cables are connected.
- Make sure the RAM is fully seated (clips closed on both sides).
- Connect a monitor to the GPU (not the motherboard, unless you have no GPU).
- Connect a keyboard and mouse.
- Plug in the power cable and switch the PSU on (the switch on the back).
Press the power button. If everything is connected correctly, you will see fans spin, lights come on, and within a few seconds, your motherboard's BIOS splash screen will appear on the monitor.
Common First-Build Mistakes
- Forgetting the I/O shield. This has to go in before the motherboard. Realising you forgot it means removing the motherboard to install it.
- RAM not fully seated. The number one cause of "my new PC will not post." Push harder than you think you need to. The clips must close.
- Monitor connected to motherboard instead of GPU. If you have a dedicated GPU, always connect the monitor to the GPU outputs, not the ports on the motherboard I/O panel.
- Forgetting the 8-pin CPU power cable. It is easy to overlook because it plugs in at the top of the motherboard, away from everything else. Without it, the system will not post.
- Front panel connectors wrong. These tiny cables are easy to get wrong. Double-check with the motherboard manual diagram. Incorrect polarity on the power LED just means the light will not work, but wrong power button connections mean the PC will not turn on.
- Not installing standoffs. Without standoffs, the motherboard sits flat against the metal case tray, causing short circuits. Most modern cases have standoffs pre-installed, but always verify.
- Static damage. Building on carpet in socks is asking for trouble. Work on a hard surface and touch the metal case frame periodically to discharge static.
After Your First Boot
BIOS Setup
When you see the BIOS screen, check that all your components are detected: CPU model, RAM amount and speed, and storage drives. Enable XMP (Intel) or EXPO (AMD) to run your RAM at its advertised speed rather than the default lower speed.
Installing Windows
You will need a USB flash drive with the Windows installation media. You can create one on any existing PC using Microsoft's Media Creation Tool. Boot from the USB drive, follow the installation wizard, and install Windows on your new NVMe SSD.
Installing Drivers
After Windows is installed, download and install your GPU drivers from NVIDIA (GeForce Experience) or AMD (Adrenalin Software). Then install your motherboard's chipset drivers from the manufacturer's website. Windows Update will handle most other drivers automatically.
Start Your Build Today
Building a PC is one of the most satisfying tech experiences you can have. You end up with a machine that is exactly tailored to your needs, built with the quality components you chose, and fully understood by you for future upgrades and troubleshooting.
Use our PC Builder tool to configure a compatible system with real-time pricing, or browse our full range of components and peripherals. If you get stuck at any point during your build, our team is happy to help. Get in touch with any questions.